Making a Japanese Do (harness or cuirass) in the lamellar style with kydex kozane plates
Navigation:
- HELMET: Making a Kabuto (Japanese Samurai Helmet) with Kydex
- MASK: Making a Men Yoroi (Mempo) for a Japanese Armour
- SLEEVES:Making a Kote and Tekko (Armored Sleeves with upper and lower plates and hand plates)
- CUIRASS: Making a Japanese Do (harness or cuirass) in the lamellar style with kydex kozane plates
Bauanleitung in deutscher Sprache auf halloland.de:
English Language:
Making the Do was technically the easiest part of the entire armor, however, it took quite some time and a lot of resources (laces and lamellars). There are various ways and many different styles to choose from, if you want to make a do. However, since I wanted to build an 12th century armor and since during this period, lamella style armor was pretty common, I decided to go for this option.
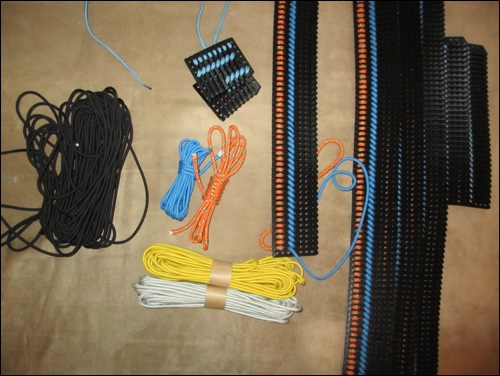
Material for making a japanese style Do (Cuirass/Harness)
Since I do not have the equipment to do metal work, I decided against steel plates. If you go for steel, consider that it will take some time and quite some experience to forge them. They might look better, though.
So I got a solid 3mm aluminum plate. Easier to cut with an angle grinder and easier for drilling holes. In the end I decided against aluminum and went for Effingham Plates by a company called Plastic Lamellar. The plates/scales (kozane) where originally designed by the author of http://www.sengokudaimyo.com. To my knowledge, they are meant for japanese lamellar armor.
I made an order of 2000, which where a bit too many for the do. However, I used the remaining plates for the sode and kusazuri.
I actually used approximately 1400 for the cuirass. If you are not a US citizen and if you want to purchase the plates mentioned above (the company above is located in the US and ships from there), keep in mind that your order might be stuck at your country customs. You might have to pay tax /customs duty on the order. The price for the lamellas is kind of okay, but I had to pay an additional 19% tax and almost 100 EUR handling fees to the customs.
The plates
The plates where easy to work with and I think they look good and server their purpose. They where a bit thinner than I thought. However, the way I build my Do, there will always four plates overlapping, so that you are protected by a layer of four.

A single lamella plate or scale. It shows 13 holes and in the end, a lace will go through each of these holes. A lot of work need to be done to get a full japanese armor / do in early 12th century samurai style.
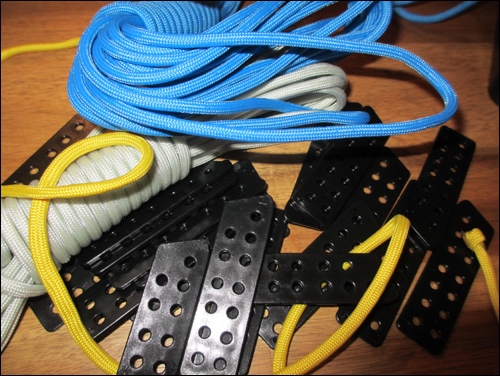
Laces and lamella scales of plastic
Along with the plates, you will need a lot of laces. I purchases paracord and removed the core fibers. You will have to push the cord through many holes over and over again. The paracord has an advantage over other products: I took a ligher and melted the end of the paracord to a point. It makes it easier to lace the plates. I neededa lot of paracord. A lot. I mean it. Some hundred meters, all in all. I purchased the first meters of paracord just somewhere. When I had to reorder, I forgot where I got it and I could´t find it, anymore. It is a good idea to keep in mind where you purchase it so that you can re-order the exact same paracord. This is important for your color scheme.
Think about your color theme in advance. If you follow the traditional japanese way, there are rules for the color theme. I followed my taste an skipped this part.

How does the lacing work? There are probably various ways. I chose to follow the instruction of a guy who has put a youtube video online (its not me). This explains quite well how it could be done. However, continue to read.. the pictures below will hopefully make it easier to understand:
About the Style of my Do and the amout of plates I needed
I decided to build a do that covers the brest from the front. Therefore I built two bands of plates. And I wanted the rest of the do to protect the entire circumference of by body, starting to go around the entire body from the armpit downwards. Therefore I build 10 bands of plates.
You need to simply try out, how many plates for a band you will need. It depends on your body circumference and the width of your chest.
For the front part that covers the brest, I needed around 25 plates in a band and two bands in total.
The part that reaches around the entire body took 120 plates per band and I produced 10 bands in total.
So all in all I needed 1250 effingham plates for the do.
How to lace the plates
First, I laced the individual kozane plates (scales) into bands by going back and forth through the two bottom holes.
The pictures below will show how to lace the individual plates together to bands:
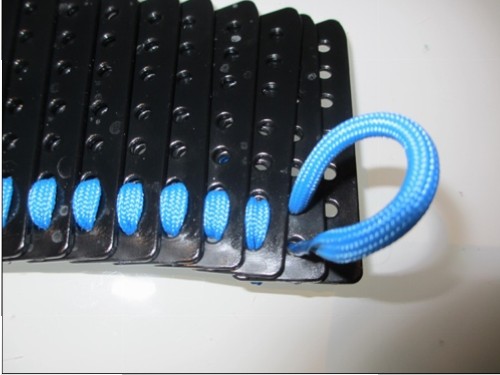
Your first lace the plates together with vertical stitches that simply go back and forth.
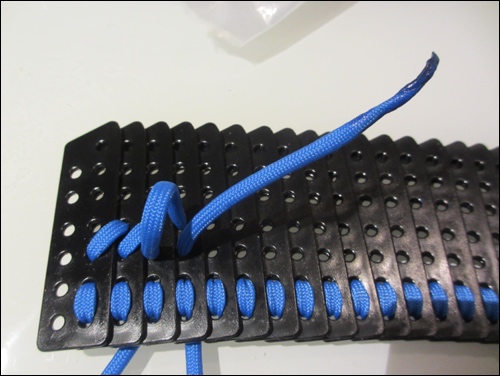
The second row of laces go aslope.
This will give you a band. It will be stabile but still flexible. The remaining holes on the upper site of the plates will then be used to lace the bands together. They will overlap by half of their length.
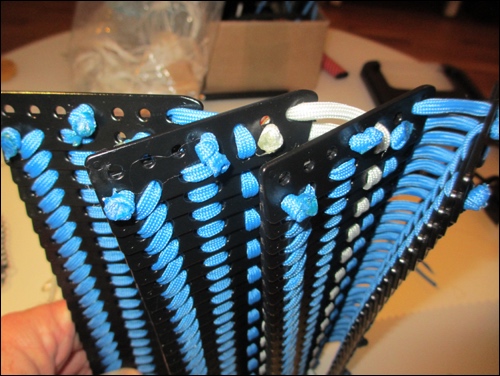
View on the side of the plates. Here you see, how the overlap.
This will give you a very stabile and still very flexible pattern.
The do comes into existence, plate by plate, band, by band. This is a very time consuming work. I needed around four hours for just one row, all in all it took be approximately 55 hours.
Next, I designed and cut out a kydex plate which I fixed to the top of the do. I drilled a two rows of holes into the plate and fixed the scales to the kydex shield in the same manner as before.
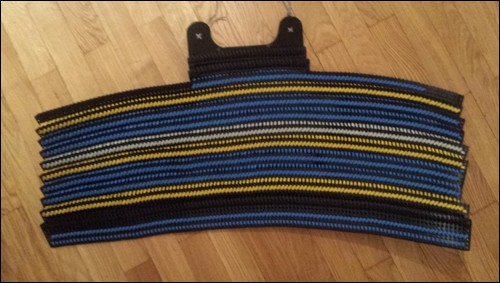
The biggest chunk of work on the do (japanese samurai harness) is done: The lacing of the scales. You can see the kydex plate added to the top of the bands of scales.
A Kydex plate was fixed to the armor on the top.
Fixing the do to the shoulders and bonding it together in the back
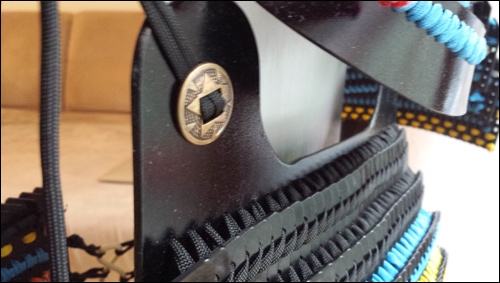
A Toggle Button was fixed to the kydex plate. This button can be fixed to the shoulder holder.
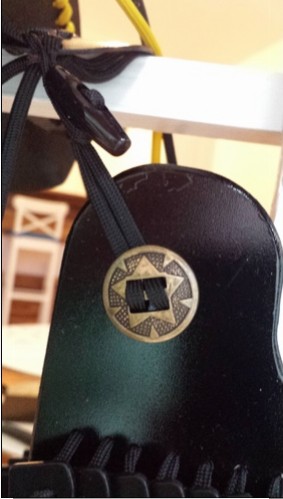
Toggle buttons (on a lace) where also fixed to the back of the do. These can also be fixed to the shoulder holder. This way, the entire do hangs on to the shoulder holders.
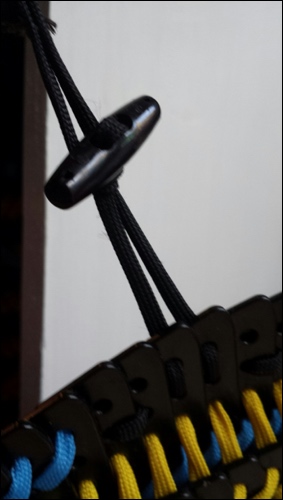
A toggle Button will serve to fix the entire do to the shoulder holder.

A look at the back of the do: I added slopes – one slope per band. A paracord goes through the sloops for bonding everything together. It always fit, regardless if I loose or gain weight.
 looks like, now.")
This is how the do (cuirass/harness) looks like, now.
I will add a coward shield to the back, later sometime.
- HELMET: Making a Kabuto (Japanese Samurai Helmet) with Kydex
- MASK: Making a Men Yoroi (Mempo) for a Japanese Armour
- SLEEVES:Making a Kote and Tekko (Armored Sleeves with upper and lower plates and hand plates)
- CUIRASS: Making a Japanese Do (harness or cuirass) in the lamellar style with kydex kozane plates
J.B. on 01 Jun 2018 at 01:49 #
Awesome!
Would you have paper printout patterns and measurements for your Armour?
J.B.
admin on 04 Jun 2018 at 22:20 #
Hi JB
I am happy to hear you like it. Sorry but no, I don´t have. I basically made it up while doing and did not document all in detail.
Best
Chris